| Last modified: | July 02, 2025 |
|---|
X2Go remote desktop
You may use remote desktop for fast and secure access to graphical applications.
Warning
2-step authentication must be configured before logging into X2Go
install
download and install the X2go client from https://wiki.x2go.org/doku.php/download:start
configure
Open the X2Go client program
If you use Mac OSX, you may be prompted you to install X11 (10.7 and earlier) or XQuartz (10.8 and later). Proceed to install either package.
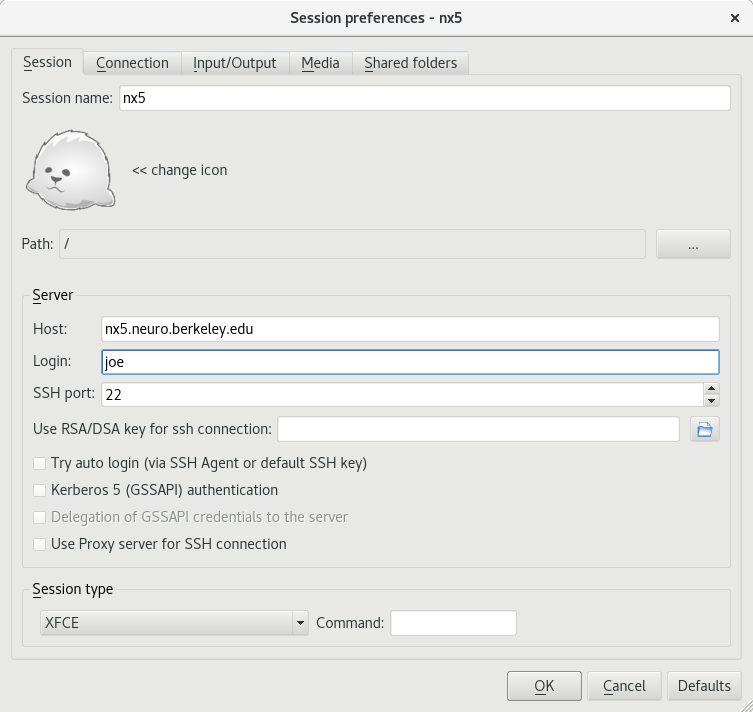
Create a new session
If a ‘Session Preferences’ window doesn’t appear, then select Session -> New Session from the file menu
Session Name: Anything goes. I use the server’s host name, e.g. nx4 (see below)
Host: Choose from a host in the table below. I recommend choosing a host with the fewest Users.

Login: Type your username on the Neuro cluster
Session Type: Use the drop-down menu to select ‘XFCE’
click image to see full-scale:
Recommended:
- Try auto login: configure a SSH key, then check the box next to ‘Try auto login (via SSH Agent or default SSH key).

start
First enable 2-step authentication
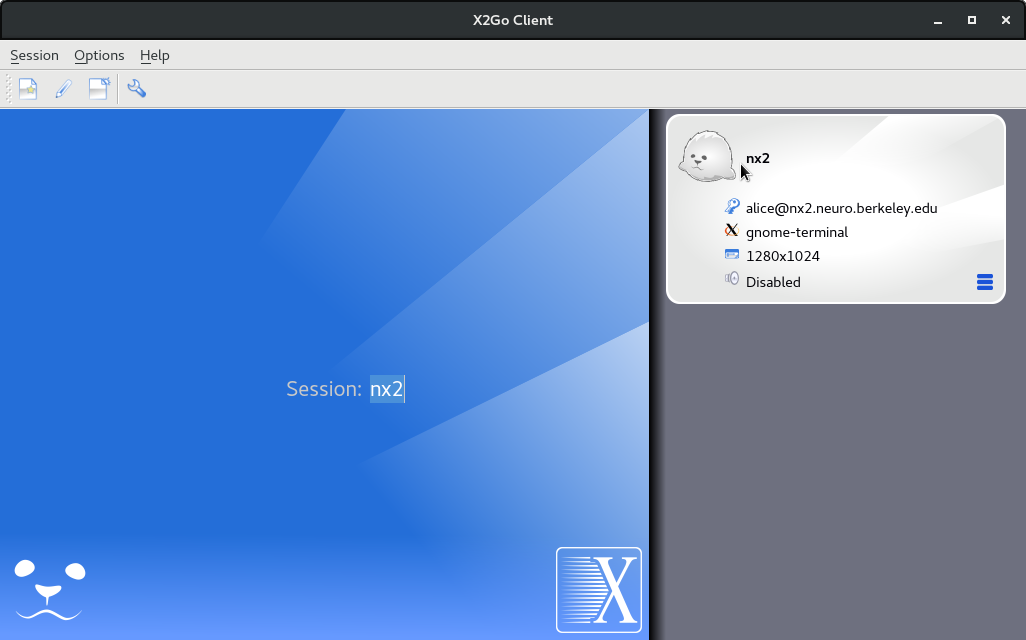
In the X2go client, there is a session box on the right with a picture of a seal and a menu (hamburger bar). To start a new session, click on the seal. To edit your session preferences, click on the menu button.
Type your password in the field provided.

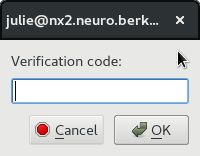
A new window will open requesting a ‘Verification Code’. Open the Google Authenticator app on your device, and look for the 6 digit code. Type that code into the window requesting the ‘Verification Code’.
managing your x2go session
By default, your x2go session will remain active and running... even if the x2go application is closed, or internet access is lost.
suspend
When you close the x2go application (or lose internet access), you will remain logged in, and your x2go session will continue to run. You may resume the x2go connection from any computer. This is called suspend and resume, because your x2go session is running in the background, without an active connection to the neuro cluster.
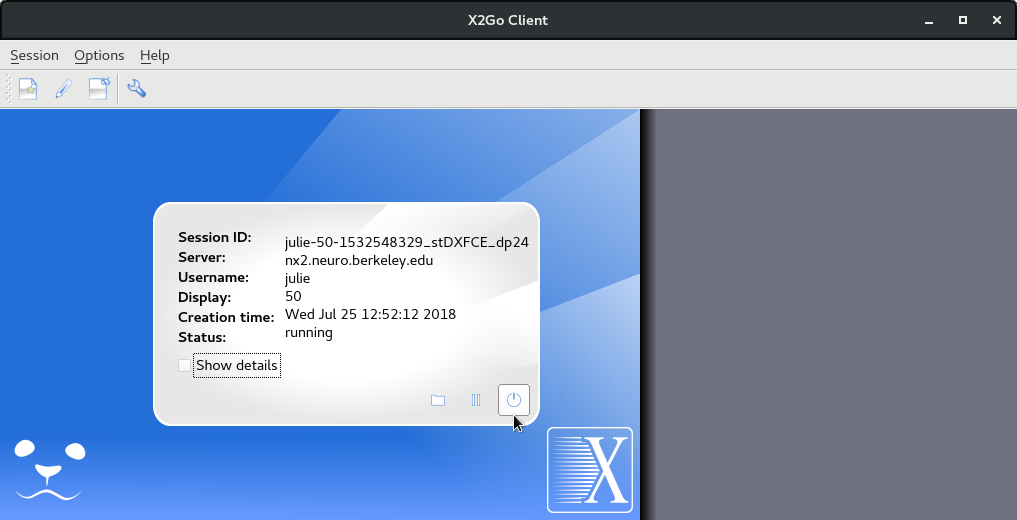
terminate
To terminate (log out) of your x2go session, you may either
click the ‘power’ button.
... or log into a different x2go server (nx1-nx6). The previous x2go session will be terminated automatically.
If you want to resume a X2Go session, but forgot where it’s running, then log into a Neuro cluster computer with secure shell, and run the ‘cjobs’ command.
performance
for best performance...
Login to the X2Go server with the fewest number of users. This information is provided below, or by using ‘nxload’ command on the Neuro cluster.
Limit cpu-intensive jobs within X2Go
The X2Go servers have only 8 CPU cores, and are used by multiple labs.
If you use more than 3 cpu cores in your X2Go session, then your jobs may be restricted to a single CPU core. You will receive email with instructions about how to use Grid Engine to run jobs in parallel. Grid Engine distributes jobs across the cluster for optimal performance.
When using secure shell (SSH) or python notebook, log into the server where your X2Go session is running.
Please do not log into multiple servers simultaneously. If you want to run jobs in parallel, please use Grid Engine.
Use your local web browser to display the Jupyter Notebook.
If you experience network lag...
- in the office, use a wired network connection. Shared wireless networks may cause lag if somebody is transferring data.
- disable backup software on your computer (dropbox, Google drive, Box, etc)
- confirm that your (graphics) application uses a graphics processor to render images. For a list of applications that use a graphics processor, run ‘gapp’ from the command line.
if you continue to experience performance problems, email support-neuro@berkeley.edu. Please include the following information:
- description of problem, e.g. slow screen updates, analysis takes longer to complete, etc
- name of server, e.g. nx1
- name of program
- command line used to run program
- error message
troubleshooting
login fails
If you receive an error when logging in via X2Go, then
wait a few minutes. The X2Go state database is refreshed every 5-10 minutes
log into a server with the fewest users
email support-neuro@berkeley.edu. If you’ve waited a few minutes, and want to resume your session, then email me. Sometimes I can help ;)
fonts
Table Of Contents
Previous topic
Next topic
This Page
Email Support
Supported Labs
- Weiner Lab
- Jagust Lab
- D'Esposito Lab
- Knight Lab
- Walker Lab
- Bunge Lab
- Bishop Lab
- Collins Lab
- Shenhav Lab
Affiliations