| Last modified: | March 19, 2025 |
|---|
X2Go Client Configuration
Open the X2Go client program
If you use Mac OSX, you may be prompted you to install X11 (10.7 and earlier) or XQuartz (10.8 and later). Proceed to install either package.
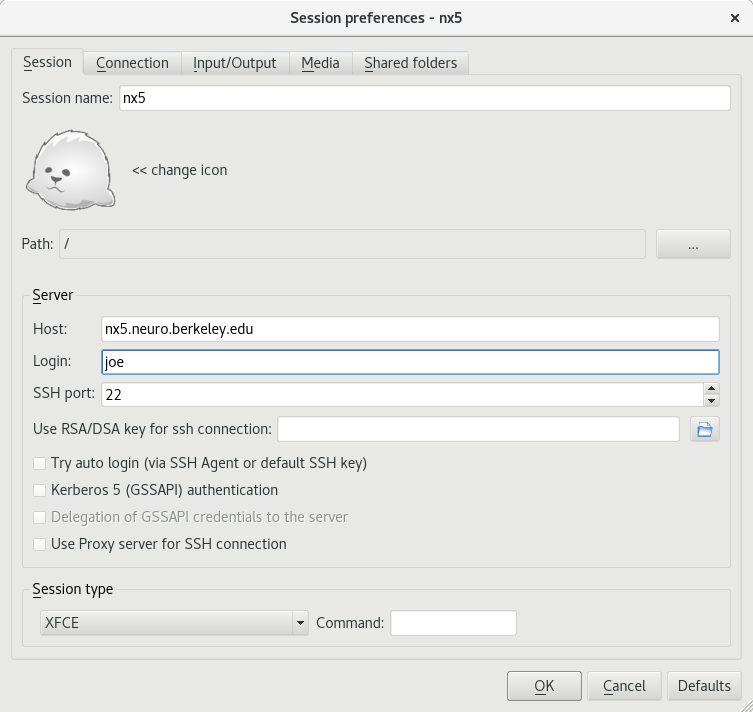
Create a new session
If a ‘Session Preferences’ window doesn’t appear, then select Session -> New Session from the file menu
Session Name: Type ‘neuro cluster’, or whatever name you prefer.
Host: Choose from a host in the table below. I recommend choosing a host with the fewest Users.

Login: Type your username on the Neuro cluster
Session Type: Use the drop-down menu to select ‘XFCE’
Optional:
- If you configured a SSH key, then check the box next to ‘Try auto login (via SSH Agent or default SSH key).
- Choose your internet connection speed from the Connection tab. The default is ADSL.
- Change your font size on the Input/Output tab, then Set display DPI. The default is 72, increasing the size will result in a larger font (96 dpi is generally good).
click image to see full-scale:
There is session box on the right with a picture of a seal and a menu (hamburger bar). To start a new session, click on the seal. To edit your session preferences, click on the menu button.
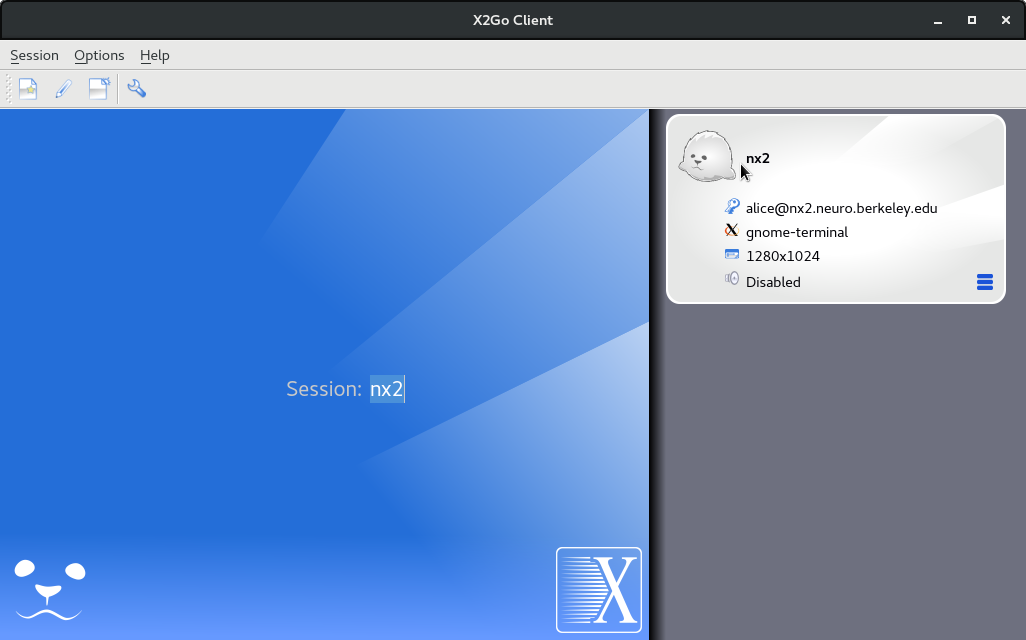
Type your password in the field provided.

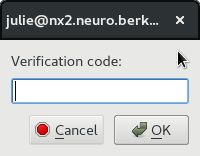
A new window will open requesting a ‘Verification Code’. Open the Google Authenticator app on your device, and look for the 6 digit code. Type that code into the window requesting the ‘Verification Code’.
tips
If you don’t see the baby seal, then click the ‘cancel’ button.

To terminate your session, click the ‘power’ button.
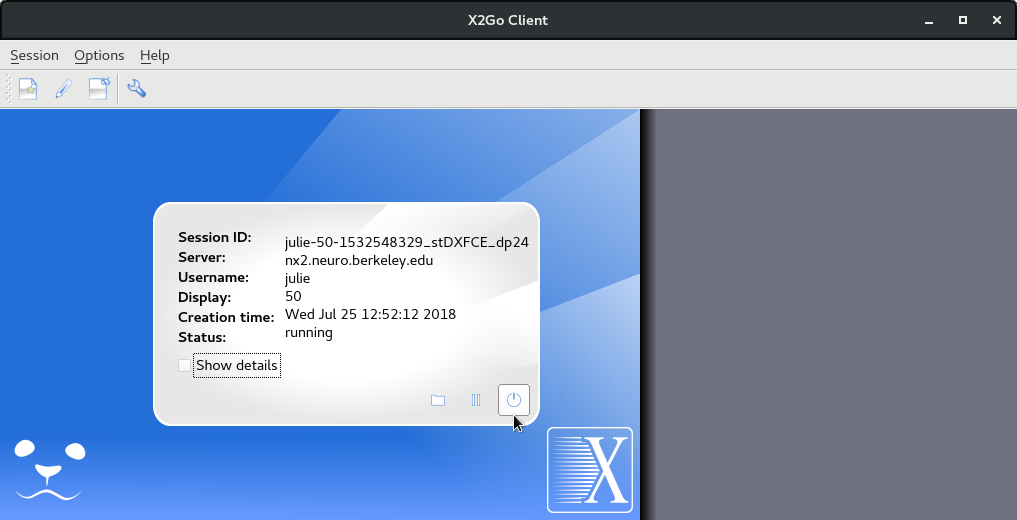
To suspend your session, you can simply close your laptop, or click the ‘pause’ button just to the left of the power button (displayed above). Most of the time, it’s unnecessary to suspend a session, because you may resume a session that was left running on a different computer.
Table Of Contents
This Page
Email Support
Supported Labs
- Weiner Lab
- Jagust Lab
- D'Esposito Lab
- Knight Lab
- Walker Lab
- Bunge Lab
- Bishop Lab
- Collins Lab
- Shenhav Lab
Affiliations